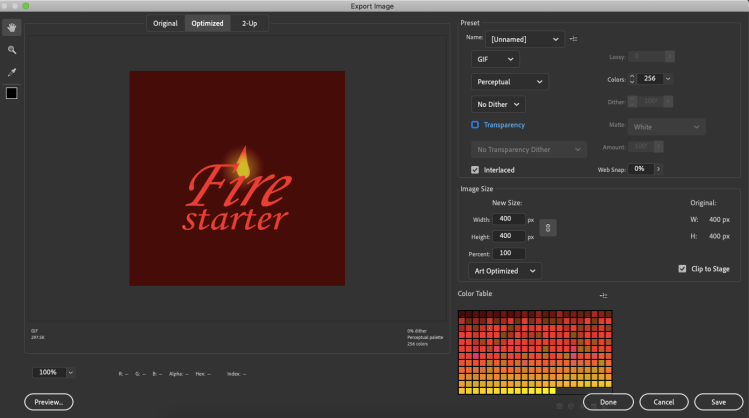
 Once I finished adjusting the animation tween I added between frames 20 and 40 of my fire effect layer I then had to test my animation to see if I made any mistakes as I followed the steps for lesson 7 by clicking the control option at the top of my projects workspace and selecting the test movie option with my selection tool which allows me to see the progress I made in my animation.After correcting any mistakes I made in my animation I was finally ready to export my animation into a video in order to to this I had to first select the file button at the top of my workspace and select the export button and choose the export animation option from my project workspace.By doing this simple step I basically allowed a pop up menu to appear called export image which will allow me to make any final touches to the formate or appearance of my animation before I finalize it.Once I reached this step I then had to look at my animate book and follow the instructions it gave me for exporting it.The first thing i did once the panel appeared was change my background from transparent to non transparent by clicking the check box next to the transparent option and I also picked the perceptual and interlaced option from the pop up menu.The last thing I made sure to do is change my width and height of my animations stage to 400 and also the colors value to 256 so my animation will appear at a reasonable size with all my transitions in it.Once I clicked save on the export image panel I then had to save the project as 07 finished flame animation and upload to my blog as an animated gif that play’s in a continuous loop.
