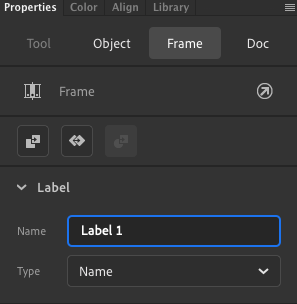


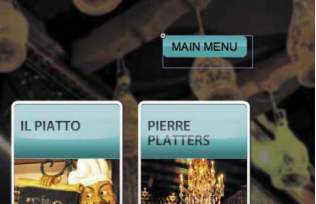


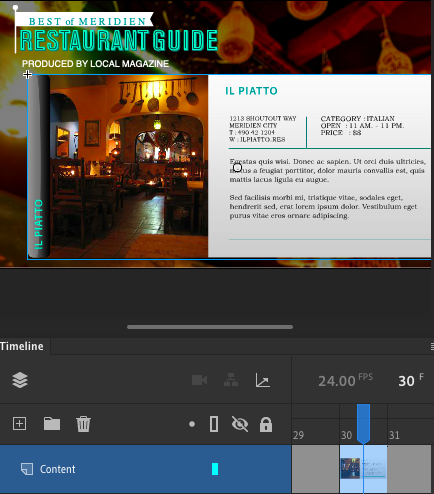
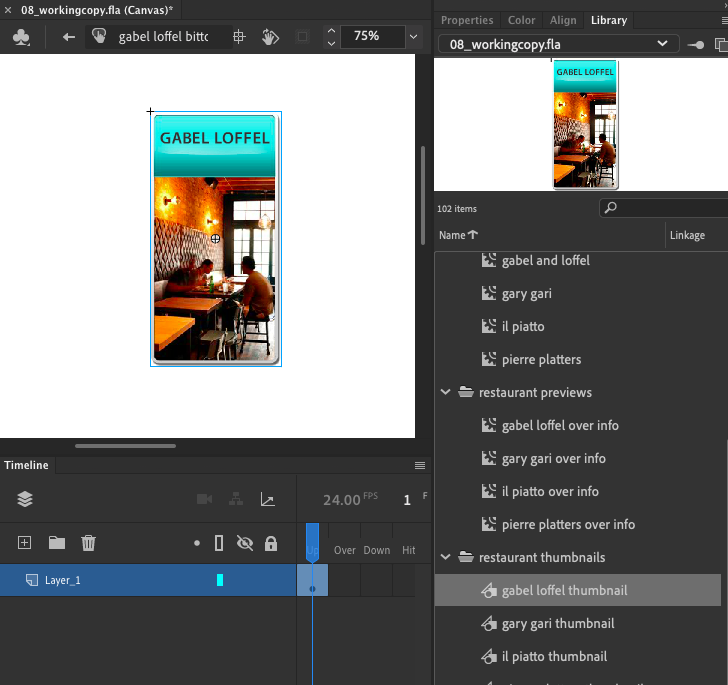
 In this post I had to add computer coding and create a layer that contained it in order to allow my restaurant Guide animation to play with all the changes I made in my previous blog post.But before I added this code I had to first label each keyframe in my content layer so I can distinguish between them easily without getting them mixed up.In order to do this I had to select each individual keyframe on the content layer I created last time and go to my projects properties panel so I can pick the frame option from the panel and title it label with a number at the end which automatically appears on the keyframe I wanted to change.For example If I decided to rename the keyframe thats present on frame 10 all I would need to do is select it and use my selection tool to pick my properties panel that appears to the left of my project workspace and select the Frame option so I can type label1 which suddenly appears on frame 10 once I press enter on my keyboard.I then made sure to add the main menu to my restaurant guide by selecting my library panel from the left side of my project workspace and taking the notion to unlock/open the buttons folder so Im then able to click and drag the main menu button from the library panel onto my stage where my restaurant guide wallpaper and buttons are placed.The moment I dragged it onto my stage I had to take the time to reposition the button to hover over my first button and rename it from my properties panel under button with the name mainmenu_btn. The next thing I had to do is create a new layer by selecting the create newer layer icon which is just a plus sign in the middle of a square and renamed it actions after doing this simple task I then made sure to move it to the very top of all my layers in my timeline panel.Once I did this I was then able to focus on applying or adding some computer coding to my actions layer by making selecting the actions layer with my selection tool and opening the actions panel and following the directions the book instructed about what button to press and what to type for the code whether its a .this Stop (): code or so forth.The next and last thing I had to do for this blogpost is create 4 or 6 new layers under my actions panel and rename place the coding I just created to each one by creating a new keyframe and placing the code individuals for each section which a certain directive or function.I also made sure to test my movie once I finished everything from the book to see if I made any mistakes with my coding and to test each button of my finished restaurant guide animation.


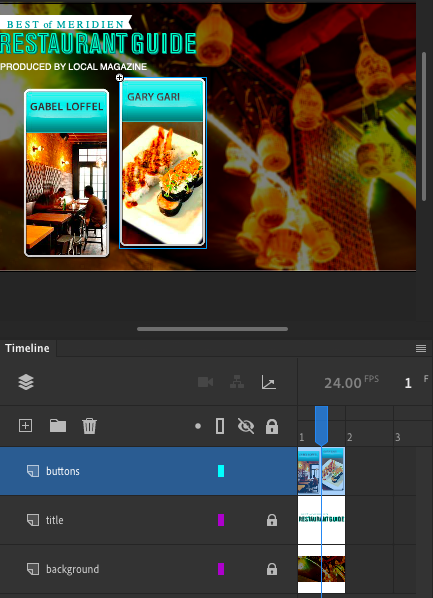


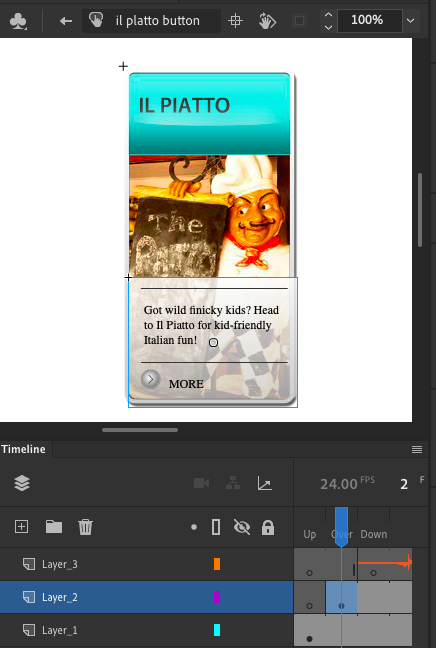


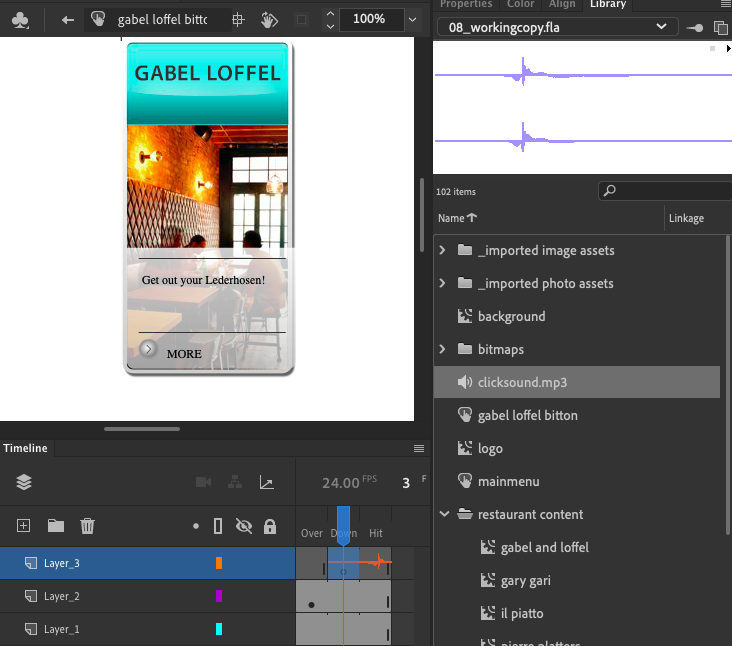 Before I started the restaurant guide animation in lesson eight I had to first open the 08_start file so I can open the actual lesson in my animate program and rename the lesson template I plan on 08_working so Im able to reopen the original 08_start file anytime I make a mistake with the one I just created.The first thing I actually did in the lesson after renaming the template is great a new symbol by selecting the file option at the top of my project workspace and picking the create symbol option.Once I did this I was then able to rename the symbol Gabel loffel button from the pop up menu and select the save button which immediately opened the symbol into its own scene on my project workspace.The next thing I had to do is add an image called Gabel loffel by using my selection tool to select the Gabel loffel thumbnail from my library panel and dragging it to the center of my stage.I then had to make sure to add 2 more layers called layer two and layer three and place 2 more keyframes to all three of my layers in order to stretch over on the down and hit functions on my projects timeline.I also made sure to add a keyframe for my down button on layer three and also my over button on layer two in order to add certain symbols or objects onto the stage at different times.For example by adding a keyframe for the down function on layer 3 I was then able to add the sound for the click sound file into that layer without affecting any other layer.The next and final thing I did after adding sound to my button is add the info caption to the over option in layer 2 so a caption with words on it appears on top of my Gabel loffel image.
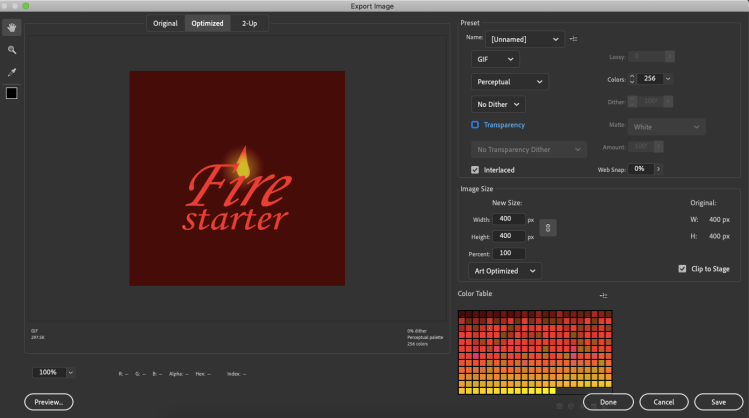
 Once I finished adjusting the animation tween I added between frames 20 and 40 of my fire effect layer I then had to test my animation to see if I made any mistakes as I followed the steps for lesson 7 by clicking the control option at the top of my projects workspace and selecting the test movie option with my selection tool which allows me to see the progress I made in my animation.After correcting any mistakes I made in my animation I was finally ready to export my animation into a video in order to to this I had to first select the file button at the top of my workspace and select the export button and choose the export animation option from my project workspace.By doing this simple step I basically allowed a pop up menu to appear called export image which will allow me to make any final touches to the formate or appearance of my animation before I finalize it.Once I reached this step I then had to look at my animate book and follow the instructions it gave me for exporting it.The first thing i did once the panel appeared was change my background from transparent to non transparent by clicking the check box next to the transparent option and I also picked the perceptual and interlaced option from the pop up menu.The last thing I made sure to do is change my width and height of my animations stage to 400 and also the colors value to 256 so my animation will appear at a reasonable size with all my transitions in it.Once I clicked save on the export image panel I then had to save the project as 07 finished flame animation and upload to my blog as an animated gif that play’s in a continuous loop.
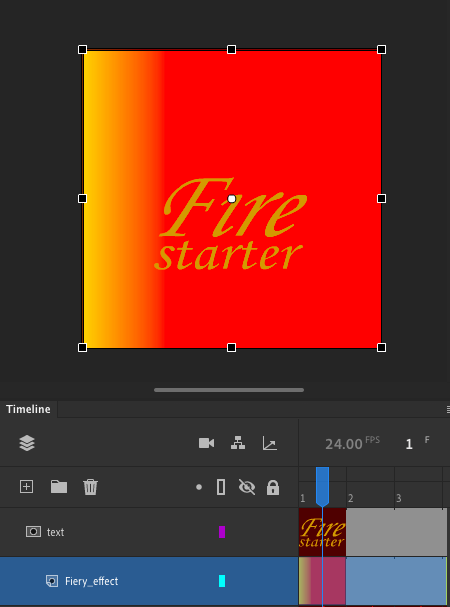


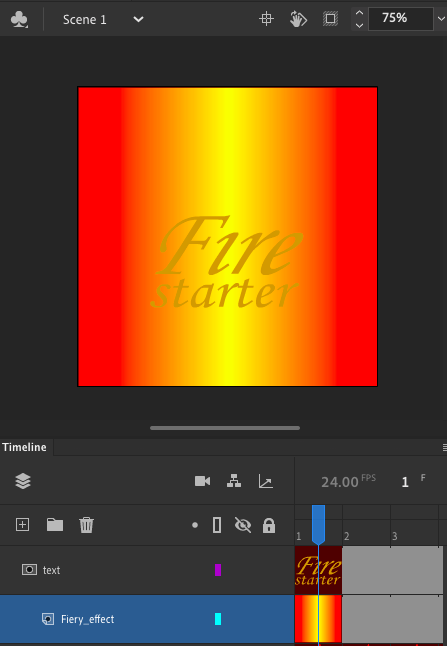


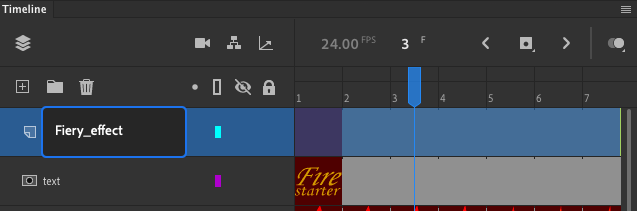

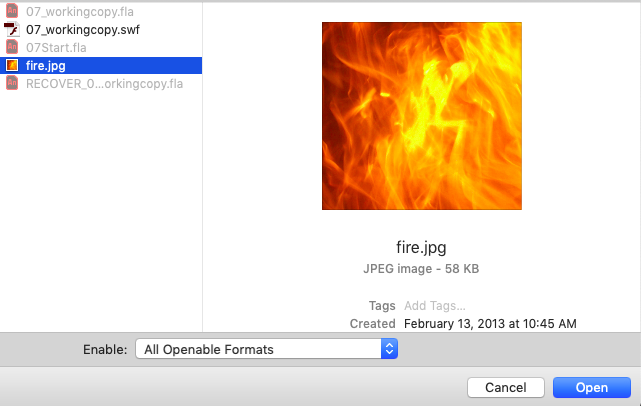
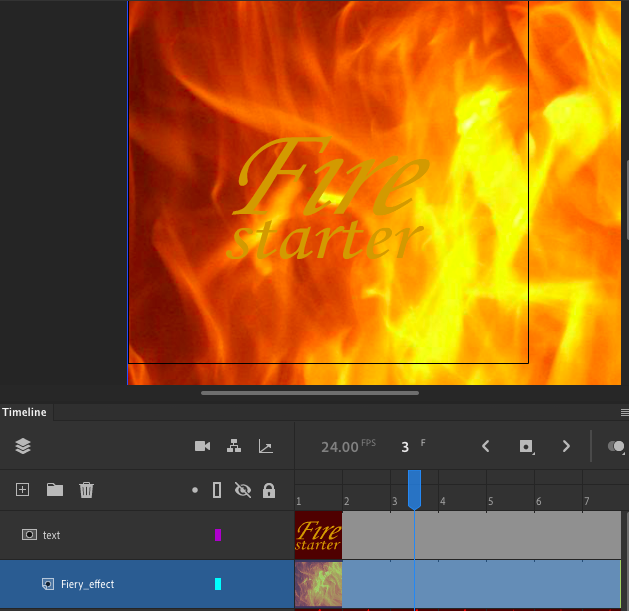

 Once I finished adjusting the shape or transition of my flame graphic in my library panel I to then focus on my text layer and to do that I had to use my selection tool to click the lock icon on my layer to unlock my text which allows me to then edit or adjust the text however I see fit.The next thing I had to do after completing this step is change the property of my text layer to a mask by selecting the modify option at the top of my projects workspace and picking timeline and finally choosing layer properties, which allows a panel to appear titled layer properties and picking the mask option from the type option in the project panel.I then focused on creating a new layer by picking the create new layer icon and renaming this layer fiery_effect and moving this new layer underneath my text layer so I can add my fire image underneath my underneath my text.The next thing I did is add a image of fire to my projects stage by selecting file, import and import to stage option and double clicking on my fire image.The final thing I made sure to do is lock my text and fire effect layers which allows me to adjust another part of my stage without effecting the text or fire layer and it automatically allows my fire image to appear underneath my text layer instead of overlapping the entire stage.I also made sure to test my movie by selecting the control option at the top of my stage and picking the test movie button which plays my entire animation with all the new changes I made seamlessly.


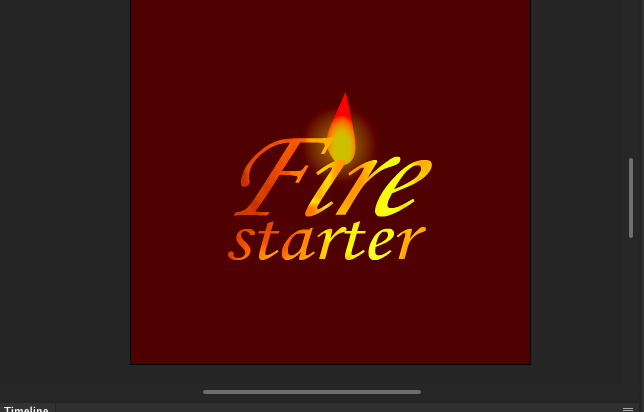
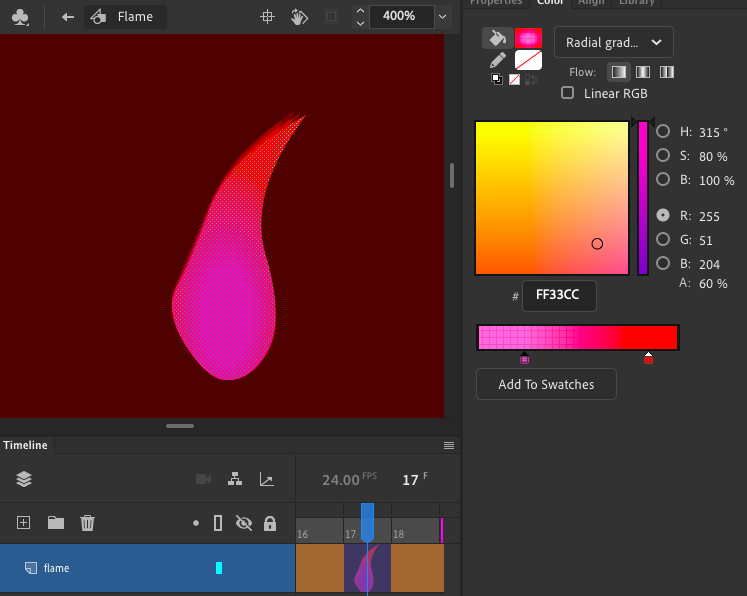 The moment I finished creating the points a and b for my flame image on frame 6 I then had to make sure my playhead is either on frame 6 or 17 and then use my selection tool to click the onion skin option button at the top of my timeline panel in my project workspace.By doing this simple step I basically allowed the animate program Im using to reveal several outlines of my flame image to appear on my projects stage which looks like some kind of blur or fade affect as I moved my blue playhead back and forth from frames 1, 6 and 17.The next thing thing I had to focus on is adjusting the inner color of my flame on frame 6 by using my selection tool to select the gradient tool from my tools panel which appears to be a rectangle with a grayish black tint texture.I then made sure to adjust the position of the orangish red color by either using my selection tool too click and drag the flame texture within my flame image or moving the color swatches in the color panel of my projects workspace.The next and final thing I had to do after adjusting the flame image on frame 6 is change the yellow color on frame 17 to a light pink by wither moving the color swatches once again or typing the color code FF33CC in the color panel which automatically changes the flames inner color to pink.